Simply CRM provides you with the Emails app, which allows you to predefine email templates for your email marketing campaigns. Using this app, you can create and send highly responsive HTML emails to all of your customers.
Our system comes with many useful variations for onboarding emails, invites, reminders and thank you notes. However, that’s only scratching the surface.
With Simply, you can also create your very own templates from scratch. Use our powerful and intuitive template builder or import your premade templates from elsewhere.
How to create email templates
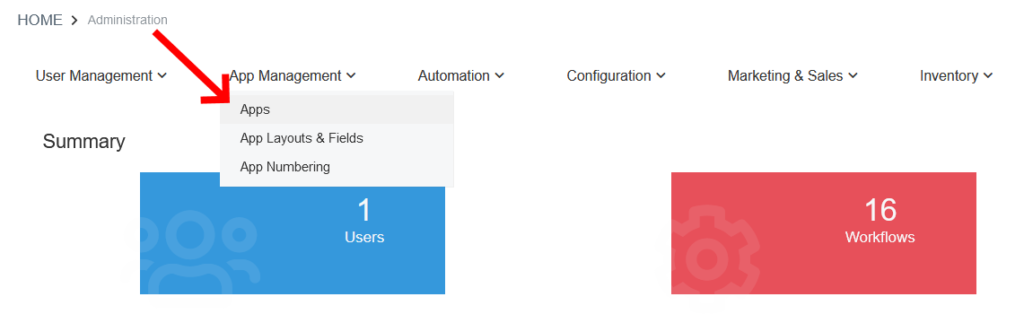
Before you start using the built-in email templates, you’ll first need to activate the Emails app in your instance. To do that, go to your Settings and select Apps under App Management.
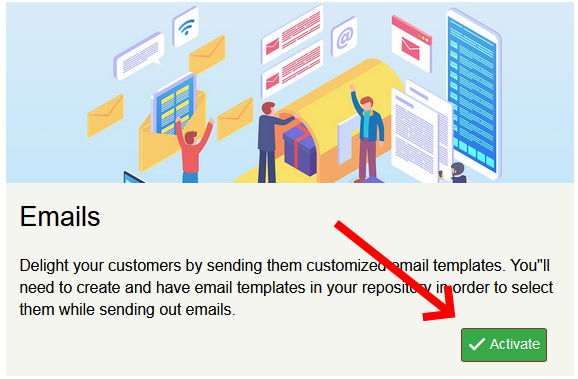
 In the Simply App Store, find the Emails app and press Activate in its card.
 You should receive a notification informing you that the app was successfully installed on your instance.

Once you install Emails, select the Tools option on the left menu and press Email Templates.
 This way, you’ll open the list view of the predefined email templates in Simply CRM.
 The templates shown in the image above come preinstalled with each instance of Simply CRM. Feel free to browse through them and check whether you can use them for your own business.
You can click on any template in the list to open its detailed view. Then, you can customize the template according to your needs.
For example, if you click on Customer Portal Login Details, you’ll open a window that shows you the email template and its properties.
 You can edit, duplicate or delete any existing email template using the buttons in the top right corner.

If you wish to create a new email template, click the Add Email Template button in the top left corner.

In the new window, you can add or change the template name and description as well as introduce variables made from your CRM data.
To add variables, choose the app & field whose data you want to include in the email template in the Email Template Description section. Once you select the field, the variable will automatically be added to your cursor’s location.
Important: You can only add variables to the email subject line or the email body text.
For example, if you select Contacts as the app and First Name as the field, while keeping your mouse cursor in the Subject field, you’ll generate the variable $contacts-firstname$.
 If you want to edit the email body text, use the advanced visual editor shown below. You can edit your template using our drag-and-drop builder or enter HTML/CSS code directly.

Edit the email template according to your personal needs and references. Feel free to add your own text, images and formatting to apply your company’s branding to the emails.
After you’re done editing, press the Save button at the bottom of the screen.

Email templates in the new interface
In the new interface, open Tools > Email Templates. The list shows template name, subject, app and description, and you can search it. Click a template to open it.
- Details shows the email as the recipient sees it. Click Edit under it to change the body, then Save.
- App for merge fields + Insert field: choose an app (e.g. Contacts) and a field. It is inserted where your cursor is, as e.g.
{{contacts.firstname}}. Fields of linked records (e.g. the contact's organization) are in the same list. You can also type{in the body to search for a field. - General fields inserts company details, the current date and time, and links such as View in browser.
- Visual / HTML: write simple templates in the visual editor. Templates with their own design (colors, fonts, layout tables) open as HTML, with a live preview next to the code, so the design is kept when you save. If you switch such a template to Visual, you are asked first, because the visual editor removes formatting it cannot keep.
- In the full form you also find Email options, Parent template, Recipient and Keywords, as in the old interface.
Both {{contacts.firstname}} and the older $contacts-firstname$ work in templates. New templates should use {{...}}.
Formatting merge fields
Add a filter to a field with |, for example {{contacts.firstname | uppercase}}. Several filters can be chained: {{contacts.lastname | safe_firstname | titlecase}}.
| Filter | What it does |
|---|---|
uppercase, lowercase, titlecase |
Changes the case |
date:"DD-MM-YYYY" |
Formats a date |
normalize_phone |
Formats a phone number |
safe_firstname |
Keeps only a recognised first name |
prefix:" ", suffix:"!" |
Adds text before or after the value, only when the value is not empty |
default:"there" |
Text used when the value is empty |
Example: Hi{{contacts.lastname | safe_firstname | prefix:" "}}, gives “Hi Karin,” or just “Hi,”.
Lists of records as a table
{{#table ...}} inserts a list of records as a table, for example a user's tasks for today or a customer's unpaid invoices. It works in email templates, in normal emails and in the workflow action Send Mail. The table is built separately for each recipient when the email is sent.
Examples:
{{#table module=Calendar filter=12 owner=recipient}}– the recipient's own tasks from list filter 12.{{#table related=Invoice filter=34 skip_if_empty=1}}– the invoices linked to the contact the email is sent for. If there are none, the email is not sent.
| Option | What it does |
|---|---|
module=Calendar |
The app to list records from |
related=Invoice |
Lists records of this app that are linked to the record the email is sent for (instead of module=) |
field=contact_id |
With related=: which link field to use, if the app has more than one |
filter=12 |
The list filter to use. Without it, the app's default list is used |
columns=subject,due_date |
The fields to show. Without it, the filter's columns are used |
owner=recipient |
Only records assigned to the recipient |
sort=due_date order=asc |
Sorting. Default: last changed first |
limit=10 |
Maximum number of rows (default 25, max 200) |
empty="No open tasks" |
Text shown when the list is empty |
skip_if_empty=1 |
Don't send the email to a recipient whose list is empty |
as=sender |
With module=: also show the list to recipients who are not CRM users |
Who sees what: If the recipient is a CRM user, the list is built as that user. They only see records they have access to, and dates, numbers and column names follow their own settings. Recipients who are not users (for example customers) never get a module= list unless you add as=sender. A related= list only contains records linked to the email's record. For external recipients, choose the columns with columns=, so internal fields are not sent out.
The filter number is shown in the address bar when you open the filter in the list view (viewname=12). Field names are the same as in merge fields, e.g. {{invoice.invoice_no}} → invoice_no.
How to use email templates
When you finish creating your email templates, you’ll be able to send them to any contact in the system.
If you’re unsure how to send emails from Simply CRM, please check our detailed guide on Mail Manager. There, you will find instructions on how to integrate your email account with Mail Manager and send emails directly from Simply CRM.
If you want to automate emails, you can configure workflows to send email templates whenever your predefined conditions are met.