How to Create and Manage Incoming Webhooks in Simply CRM
Webhooks are a powerful way to automate actions in Simply CRM by sending real-time data to external services whenever specific events occur. This guide will walk you through the process of creating and managing incoming webhooks within Simply CRM.
What is an Incoming Webhook?
An incoming webhook is a method of receiving HTTP requests from external services whenever certain events happen within Simply CRM. This can be used to integrate Simply CRM with other applications, automate workflows, or trigger external actions based on CRM events.
Creating an Incoming Webhook
To create an incoming webhook, follow these steps:
-
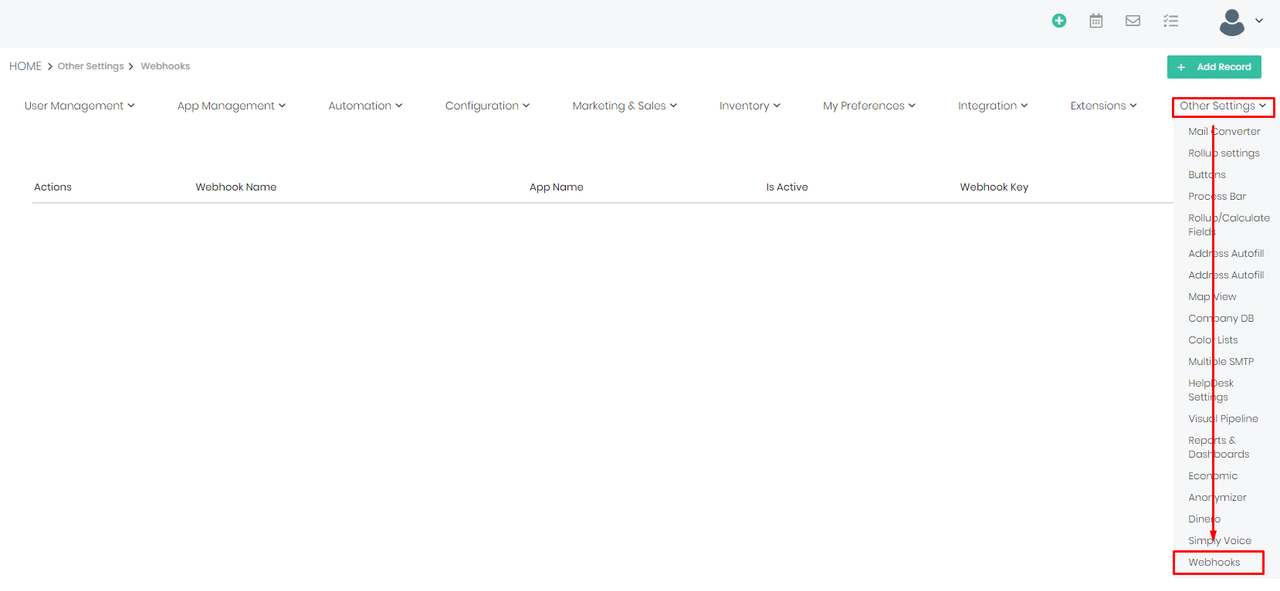
Navigate to Module Settings
-
Go to the module for which you want to create an incoming webhook.
-
Open the settings by clicking on the settings icon within the module.
-
-
Go to Record Creation
- In the settings menu, select "Record Creation." This is where you’ll set up your incoming webhook.

-
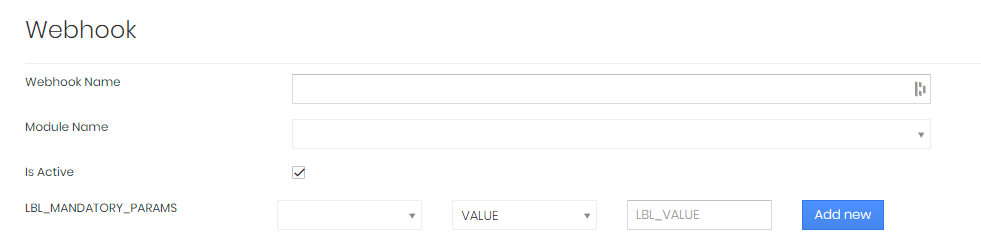
Fill in Webhook Details
- You’ll be presented with a form to fill in the webhook details. Below is an explanation of each field.
-
Webhook Name: Enter a descriptive name for your webhook. This name will help you identify it later.
-
Module Name: Select the module in which the record will be created when the webhook is triggered.
-
Is Active: Toggle this option to enable or disable the webhook. If disabled, the webhook won’t send data even if triggered.
-
Mandatory Parameters: Here you can specify the required fields that must be filled when creating a record via the webhook. Fields marked with red text are mandatory.

Adding Fields to Create a Record
When setting up the incoming webhook, you’ll need to define the fields that will be sent in the HTTP request when the webhook is triggered.
-
Select the Module Field
- Choose the specific fields from the selected module that you want to include in the webhook request.

-
Specify the Value Type
-
For each field, you can specify the type of value it will contain:
-
Value: Use a fixed value that you enter in the field.
-
Field: Use the value from a specified field in the record.
-
Expression: Use an expression to dynamically generate the value.
-
Reference: Use a reference to another record or module.
-
-
Testing and Saving Your Incoming Webhook
After setting up your incoming webhook, it's important to test it to ensure it works as expected.
-
Test the Webhook
- Use the testing functionality within the module to simulate the event that would trigger the webhook. Verify that the data is being sent correctly to the external service.
-
Save Your Webhook
- Once you’re satisfied with the setup and testing, save your webhook.
Managing Existing Webhooks
You can manage your incoming webhooks by going back to the module’s settings where you initially created them. Here, you can:
-
Edit: Make changes to an existing webhook.
-
Deactivate/Activate: Toggle the webhook’s status without deleting it.
-
Delete: Permanently remove a webhook if it’s no longer needed.
Tips for Using Incoming Webhooks Effectively
-
Ensure Security: Always verify that the external service you’re sending data to is secure. Consider using HTTPS and validating the data sent via the webhook.
-
Monitor Performance: Keep an eye on the performance of your webhooks, especially if they are critical to your workflows. Ensure that the external services receiving the webhooks are reliable.
-
Documentation: Maintain proper documentation of your webhooks, especially if multiple team members will manage them.
Need Help?
If you have any questions or need assistance with setting up your webhooks, our support team is here to help! You can reach out to us via chat or email us at support@simply-crm.com.
By following these steps, you can efficiently set up and manage incoming webhooks within Simply CRM, ensuring seamless integration and automation of your business processes.